
You are currently browsing the tag archive for the ‘BBQ Recipes’ tag.

Drop Biscuits in a Lodge cast iron biscuit pan on a Big Green Egg
Fall and Winter are prime times to bake items that compliment our seasonal soups and stews. We’ve come across this old world style Drop Biscuit recipe and modified it a bit for the Big Green Egg.
We’ve got a small Big Green Egg that loves to hover at 400F with ease and decided to put it to use.
Tools: Big Green Egg or other BBQ cooker that can maintain constant 400F indirect temperatures. Lodge cast iron biscuit pan.
Cooker Temp: 400F, indirect heat.
Baking Directions: After making the dough, cut small 1/8″ thick pads of butter and set one pad into each void on the baking pan. Put equal parts of dough into each void on top of the butter. Be as consistent as possible and use up all of the dough – because it doesn’t keep well. Set the now filled iron pan into the preheated cooker and close the lid. Check the biscuits after 15 minutes and then again at 20 minutes. You will begin to see the biscuits brown slightly where they contact the cast iron. When they are sufficiently brown, pull them out and rest them. The biscuits should be somewhat crumbly and soft, but when given a slight turn in the baking pan, spin easily. (cooking times may vary with each grill – keep checking on them)
Dough Recipe:
Lodge Logic Cast Iron Drop Biscuit Pan
2 cups unbleached all-purpose four
2 teaspoons baking powder
1 teaspoon sugar
¾ teaspoon table salt
½ teaspoon baking soda
1 cup buttermilk, chilled
8 tablespoons (1 stick) unsalted butter, melted and slightly cooled (and additional butter for the pan)
Victorine Valley Farms Butter Flavored Olive Oil (for drizzling)
Option: Feel free to add herbs of your choice to the biscuits as well.
Mixing Instructions:
- Wisk the flour, baking powder, sugar, salt, and baking soda together in a large bowl.
- Mix the buttermilk and melted butter (8 tablespoons) together in a separate bowl.
- Combine the buttermilk mixture with the dry ingredients and stir with a rubber spatula until incorporated and batter pulls away from the sides of the bowl.
Thanks to Victorine Valley Farms for providing the wonderful local Olive Oils for our recipes. Products can be ordered on their website here…www.victorinevalley.com
We’re excited to welcome a celebrity guest to Green Leaf BBQ …Tom Porter of Big Butz BBQ fame!

by Tom Porter of Big Butz BBQ
SHIGEN! What? You’ve never heard of it? I can’t believe it. For those that have, I can imagine how excited you must be at just hearing the name. For those that haven’t, Shigen are a combination of Shrimp, Chicken, and Bacon. Now two thoughts are probably going through your head; how do you put all that together? And, what is so special about that? Both excellent questions! The first is rather easy to explain but, the second is what is discovered through the experience of creating and consuming them.
To make these delicious little beauties you are going to need to acquire some peeled and deveined “16-20” Shrimp. (16-20 refers to the size of the shrimp and in this case means you will get 16-20 per pound.) You will then need to get some chicken meat, it can be breast meat or thigh meat, doesn’t matter but it needs to be cut up into 1 inch cubes. After that there is the bacon! I myself prefer a nice thick cut bacon but you can use whichever you like the best. Also you will want a box of tooth picks, your favorite seasonings and some BBQ Sauce or Cocktail Sauce. That’s all you need to make your Shigen!
Now, you are on the way to making some of your very own! But, “what’s next?” you ask. Simple!
Take the chicken, dump it in a bowl along with your favorite seasonings this could be a rub or marinade or just about anything you can dream up, and set the chicken off to the side. Next, take out your shrimp and cut almost all the way through along the vein. If you see blood, you have cut through too far and may want to go get a Bandaid. Once all your shrimp are ready, place a piece of chicken in the deeply cut vein, take a piece of bacon and wrap it all the way around the shrimp and the chicken, then skewer it with a toothpick to hold the whole works in place. Cut off any excess bacon, take the scrap piece, lay it next to the remaining bacon and cut that much off from the rest so now you won’t have to do anymore trimming. Repeat the process until you either run out of shrimp or chicken, whichever comes first. (I have usually found that about 3 chicken breasts will make it through a package of shrimp.)
Now, all that is left to cook them, “but how?” you ask. “Shrimp are one of the most delicate things to cook in the world!” you say. First, take a deep breath! It’s going to be okay. If you have a smoker, that is great, just fire it up to about 250. If you don’t, no problem! Fire up your grill whether it be charcoal or gas. But, if it’s charcoal, have your coals on only one side, and if it’s gas, only have one of the burners going. Now that we have everything warmed up and ready to go.
You’re going to place your Shigen on the side without the flame directly under it. For those who have never done this before, it’s what they call in-direct cooking and it is one of the best ways to cook up stuff without charring it to a crisp. Your Shigen will take anywhere from 30-40 minutes to cook. In general you want to see that the shrimp has turned pink and the chicken is white, bacon crispness is going to be to your preference but, I’ve found that when it’s just got a little crisp on the edge is when they are the best. All that is left now is to take them off your grill or smoker, plate them up with some sauce and serve! If you happened to leave the tails on, you can pull the toothpicks out and serve them that way. This is great when you don’t want to find a hundred toothpicks all over your yard the next morning.
Now, there are some of you that are seasoned outdoor cooking pros or may just have a lot of cooking experience and are wondering if this can really be for real, after all, shrimp is very delicate, chicken cooks slower than shrimp, and bacon will never be crispy before the shrimp turns into something resembling an eraser. These my friends are all vital concerns and understandable, so, let me try to explain why it all works. We put the seasonings on the chicken instead of the shrimp because if you salt shrimp it dries up even faster than it normally would because of salt causing it to give off water but, because we put it on the chicken, the shrimp gets extra moisture from the chicken, keeping it from drying out. Also, salt has a tendency to work as a heat conductor so the chicken draws in heat faster and cooks faster because of it. The bacon works as an insulator for the shrimp by giving it a fat barrier from the heat so the bacon is allowed to get a crisp on it while protecting the delicate flavors of the shrimp. Not to mention, everything just tastes better with bacon. And that, my friends is the magic behind how the Shigen works.
Get outside fire up that grill or smoker and cook up a mess of Shigen not only will you wow your friends but their taste buds as well!
You can find Tom & Big Butz BBQ on most social media outlets like Twitter (@bigbutzbbq) & Facebook. He’s got a great blog at: http://bigbutzbbqsauce.net Big Butz BBQ sauce is also widely available and highly prized by those who try it – find Tom and get some for yourself!
Thanks Tom!

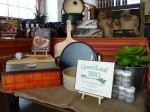
Green Leaf BBQ is officially open for business in Livermore California. Our new shop is part of Livermore’s historic “Blacksmith Square”. The Brick building offers a great courtyard for our BBQ classes and events. Our neighbors offer local botique wine tasting, olive oil tasting and a tapas style restaurant for anybody visiting the Square. The weather here is great for a backyard BBQ – offering true wine country climate with warm days and cool evenings.
Our shop is open Thursday, Friday and Saturdays from 10:30 am to 7:00 pm.
As always we feature and specialize in The Big Green Egg line of BBQ Smokers. We also carry Green Mountain Grills, Traeger Grills, Weber Grills, and other products from Lodge, OXO, Victorinox/Foschner, Wicked Good and many custom BBQ Spices, Rubs and Sauces from the professional competition circuit that simply are not available in other stores.
Check back for our BBQ Class and event schedule.
Consider this a hearty welcome to our shop – oh, and we’re pet friendly too
Come in for a visit!
Green Leaf BBQ Shop
21 South Livermore Ave.
Livermore CA 94550
(925) 449-2135
-

- Nice looking Game Hen
-

- Cornish Game Hens on a Traeger
-

- BBQ Cornish Game Hens
Carrie & I were shopping the other day – grocery shopping – our favorite pastime. We were trying to decide what to have for dinners in the week ahead. Understanding that we are in the BBQ industry, we typically choose an assortment of meats that might either provide a learning experience, or perhaps fresh material to share. Cornish Game Hens came up last night, and indeed – produced something to share.
Most folks LOVE BBQ Chicken, in one or more of it’s many forms. We serve lots of BBQ Chicken to clients and make many of recommendations to customers looking for a new way to prepare it. One complaint we’ve heard often,” The chicken breasts are just too big” or “We cooked a whole chicken and now we have to store the leftovers – that never get eaten.”
Cornish Game Hens don’t have any of those problems. One hen, split in Half will comfortably feed two people with no leftovers. Even better “SpatchCock” (or a hen with the back cut out and butterflied), but straight hen halves are wonderful.
Here are the Basics of what we did:
Frozen Game Hens – cut in half just like a chicken. One half per person is the appropriate portion.
- I tossed (3) Halves in a 2 gallon Zip Lock bag & poured a “Mojo Criollo” Marinade – this is a wonderful citrus based marinade that is traditional in Cuban or Mexican cooking.
- Let the hens soak in the marinade for (4) hours – that’s all the time I had in order to get them cooked on time. Let them soak longer if you can.
- Get a BBQ or Smoker set up with some BBQ Smoke Wood and plan for “Indirect” heat; adjusting your temps to the 250 Degree range. When the temperature stabilizes, put the hens on the BBQ. I add a water pan to the grill if I am worried about moisture – this is just a metal bread pan filled 2/3 with water & set on the same side as the hens. The pan will steam and add humidity to the cooking chamber. This can be done on ANY BBQ.
- I lay the hens on the BBQ grate – setting the thickest (breast) side of the hen towards the fire – I don’t like burnt wing and leg tips.
- Let the hens cook for 20 minutes – shake on a mellow BBQ rub once the skin has started to sweat a bit. I used D-Dog’s Maple Rub – very complimentary to poultry.
- An hour later, baste on some olive or canola oil, balsamic vinegar & honey mixture that you’ve prepared in the house…this will dilute & emulsify the dry rub that was applied earlier. The color will really come out and begin to look glossy.
- Another hour into the cook, your hens should have been on the BBQ for about 2 1/2 hours now – baste with a final BBQ sauce or glaze. Mine was simple sugar, mint, sage & a touch of brown mustard – all mixed together nicely prior to painting the hens…you can use a bottled sauce at this point too…
- Things should be VERY close to done – ensure now that the BBQ doesn’t get much hotter than the 250 degrees we’ve talked about – that sugar will burn if it does.
- The hens will be done now – and can be pulled off the BBQ. I like to put mine under a foil tent on a platter or other type of “steamer” – this allows the hens to rest while other parts of the meal are finished off.
- Enjoy those nice Cornish Game Hens – they should be super juicy & tangy sweet.
We used a Traeger Pellet Grill for this recipe, you can easily replicate this on a Charcoal or Gas grill. The Traeger Pellet Grill is easy & low maintenance – we recommend them.
Thanks for checking out our BBQ blog – I try to come up with stuff that anybody can try with success – We have many of the items mentioned in our online BBQ shop at: www.greenleafbbq.com
Best of luck,
Tim
I saw this video and thought I’d pass it along. In case you haven’t noticed, I like to focus on techniques that create sound fundamentals. I’m aware that in order to get great BBQ, many additional techniques are advised that can only be applied when the fundamentals have been established. We’ll be adding a few of those expert tricks along the way to truly make great Q.
Notice that this guy uses a Weber WSM to cook these ribs. If a person is using a different style of BBQ, Like a Traeger, Big Green Egg, Horizon Offset or a Gasser etc…keep in mind that the attainable temps may be different and should be accounted for in overall cook time.
Oh yeah, don’t depend on your charcoals flavor – add wood chunks or chips to your BBQ to give it a unique flavor & use a fire starter chimney or paper to light that BBQ — Please no lighter fluid.
I couldn’t resist posting this sauce – I got it from a friend some time ago, and have been fiddling with it a bit. This BBQ sauce is a really smooth peachy sauce that should be tried when the regular red sauces get boring. With peach season upon us here in California, maybe some fresh freestones could be substituted, make sure to add a bit of sugar to the peaches to encourage a syrup before puree process.
Black pepper can me an option if your base rub uses pepper.
Remember – different flavor layers MAKE a great BBQ.
Peach BBQ Sauce:
48 fluid ounces peach slices in light syrup
1 1/2 cups apple cider vinegar
1 cup extra virgin olive oil
1/2 teaspoon garlic, crushed
2 teaspoons Dijon mustard
1 teaspoon cinnamon
3 tablespoons lemon juice
1 tablespoon Worcestershire sauce
1/4 teaspoon ginger, ground
1/2 teaspoon black pepper
3/4 cup maple syrup
1 cup brown sugar
2 tablespoons cornstarch
1. Puree peaches
2. Mix cornstarch with a little water
3. Combine all ingredients in a large saucepan and heat to low boil, stirring occasionally
4. Continue to simmer 30 minutes, stirring frequently
5. Sauce may be thin, so at the end of cooking time, if necessary, add sufficient water/cornstarch mixture to give sauce consistency of commercial barbecue sauce
Apply this one very lightly – over the top of whatever dry rub that you used – adding thin coats until the desired “stickey factor” has been achieved. Don’t burn it – reduce temps below 300 degrees during the application process.
* The ribs in my header picture received this glaze…
Best of Luck and feel free to tell me how I should improve this recipe!
Ok, so this is a dead simple post about a great BBQ Rub, but it can be used as a regular flavor boost for about everything imaginable. This “Original Recipe” was invented by Mike Mills, and he called it “Magic Dust”. This recipe isn’t mine, and has been relentlessly copied and modified. This is a pretty basic rendition that anyone cam make simply at home and have around.
- 1/2 cup paprika
- 1/4 cup kosher salt, finely ground
- 1/4 cup sugar
- 2 tablespoons mustard powder
- 1/4 cup chili powder
- 1/4 cup ground cumin
- 2 tablespoons ground black pepper
- 1/4 cup granulated garlic
- 2 tablespoons cayenne
Make it this way first, but it you prefer a bit more heat, add slight amounts of both Black Pepper and perhaps the mustard powder. Easy on the additions, as in most spices – a little either way can completely change how you mouth tastes the rub.
Enjoy!
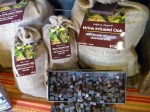
Here at Green Leaf BBQ, we’re always looking for someone doing something extraordinary. We’ve found that in Blue Star Seasoning as they continue to surprise with their seasoning’s unwavering versatility. Our friends Julie Bussemer and Nanette Fisher who own Blue Star, carry on the tradition that began when the recipe was created in the 1950’s. Made in Stockton California, Julie & Nanette’s operation produces high quality and fresh seasonings, that are truly “a great replacement for salt and pepper”, as Julie says. If salt and pepper aren’t the hallmarks for culinary versatility, I don’t know what are.
“Everyone claims that their seasoning is all purpose, that isn’t just a claim, they actually do it”, says Mark Brunello in Rocklin Ca. “We use it on potatoes, chicken, ribs…everything”, he says. We agree, and because of this versatility, Blue Star Seasoning is one that we continually recommend to our customers. This seasoning combines the traditional garlic, salt, pepper base with some secret ingredients. “The difference between this rub and other similar rubs, is that the Blue Star ingredients are in nice balance…not too salty.

BBQ Rub
Mark is the guy who introduced us to Blue Star several years ago. We just had to add it to the store after tasting Mark’s rib eye steak with Blue Star.
Consider Blue Star Seasonings next time you need something different. Visit our store or website for purchasing options: greenleafbbq.com
Cooking Tips: One of our favorite pairings with Blue Star is on a Tri-tip. We season liberally, and let stand (covered) in the refrigerator prior to cooking for at least 30 min. We like to smoke our Tri-Tip using a Traeger Pellet Grill w/mesquite pellets at about 25o Degrees for almost 2 hours then turn up the heat to finish. When internal temps reach 145 Degrees, pull it off the grill and rest the meat prior to slicing. We make a consious effort to slice the roast AGAINST the grain – it makes a huge difference.
Visit us: www.greenleafbbq.com

